

Encoding for Vimeo
We get a lot of questions from people asking how we manage to preserve the beautiful grain structure when uploading videos to vimeo. Compression hates grain, so does Vimeo.
We have tested a lot of things, but it mostly depends on the size and the opacity of the grain. Due to its nature, 35mm film grain is hard to pass through the vimeo compression algorithms. Things get easier when using 16mm or 8mm film grain. We suggest uploading and re-uploading a segment of your video until you find the perfect size and opacity. Adding Gaussian Blur, about 0.2%, helps.
We highly recommend a light touch of holygrain in any video meant for online use even if you don’t want a grainy look, as it effectively reduces color banding caused by compression.
This is how we encode our vimeo videos with Adobe Media Encoder
1. Drag and drop the clip into the Adobe Media Encoder.

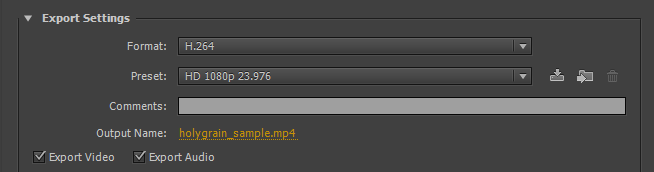
2. We are going to use the H.264 codec. Click the Presets button and choose the “HD 1080P 23,976″ preset. We are going to use this preset as a starting point.
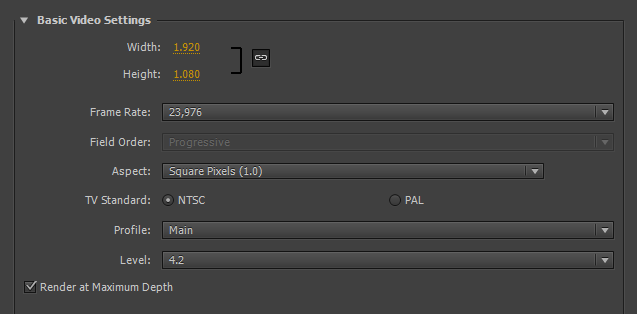
3. In the Basic Video Settings tab, lift the level limits from 4.1 to 4.2 and check “Render at Maximum Depth”.
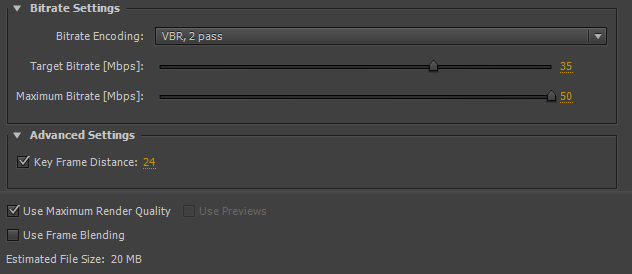
4. In the bitrate setttings, select VBR, 2 PASS. Increase the target bitrate beetween 35Mbps and 45Mbps. Set the maximum bitrate at 50Mbps. Set the keyframe distance at 24 and be sure to check “Use maximum render quality”.
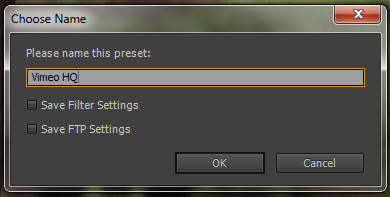
5. Finally, save the preset for future use.
Try our free film grain today.
The Filmmakers’ Choice
Holygrain is a complete library of premium quality film elements. Filmmakers, editors and colorists from all over the world use holygrain in all kinds of projects, from no budget and indie productions to commercials and feature length films.